티스토리 뷰
[node/javascript/필립스 휴] node 환경에서 휴 조명 컨트롤하기
기본적인 휴허브와 앱을 통한 조명 세팅이 되어있는 전제입니다
비공식이지만 가장 신뢰할 수 있는 오픈소스
https://github.com/bradgarropy/hue-sdk
GitHub - bradgarropy/hue-sdk: 💡 philips hue sdk
💡 philips hue sdk. Contribute to bradgarropy/hue-sdk development by creating an account on GitHub.
github.com
설치
npm install @bradgarropy/hue-sdk
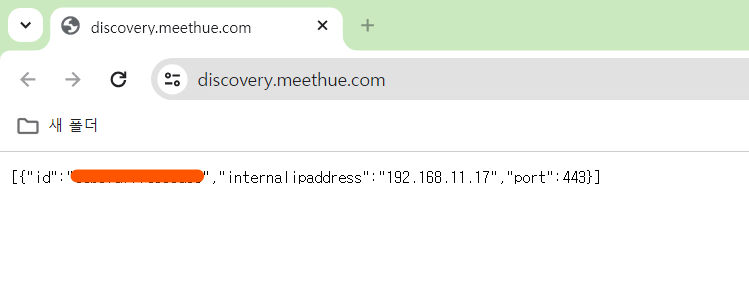
위 링크를 통하여, 현재 휴 아이피 및 아이디를 가져온다(고정 아이피 권장)

#위에 명시된 아이피와 뒤에 주소로 이동한다
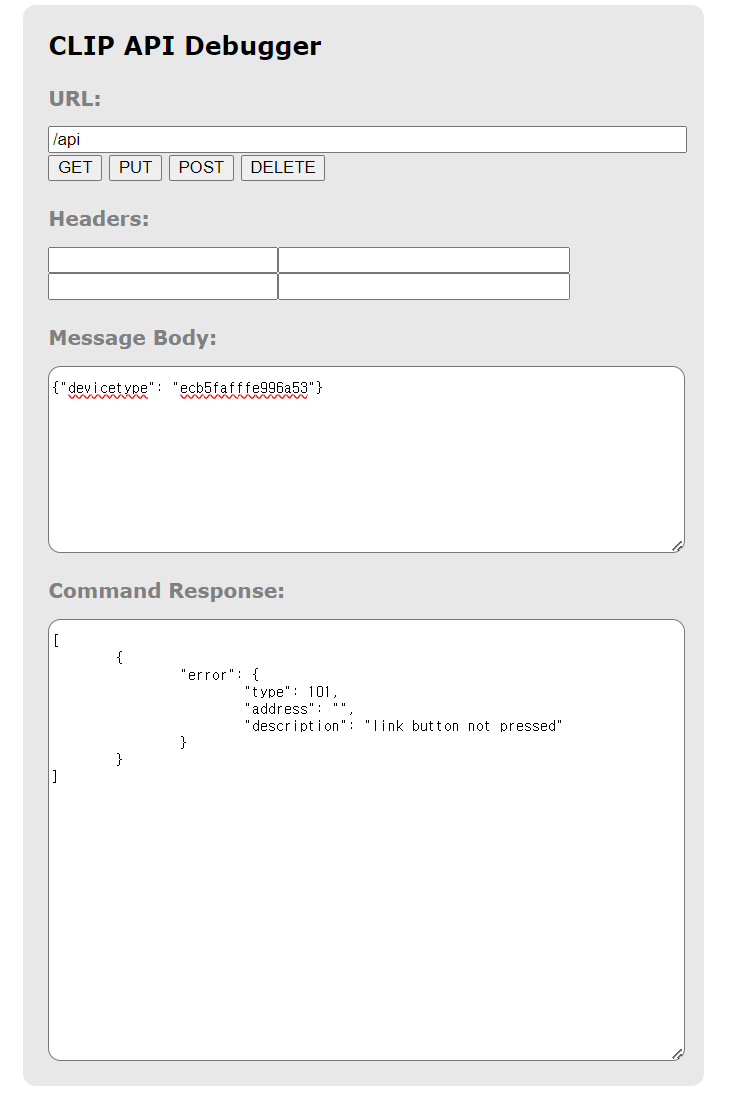
https://192.168.11.17/debug/clip.html
url:    /api
method: POST
body:   {"devicetype": "<USERNAME>"}
정보대로 입력 USERNAME에 위 링크에서 나온 아이디 입력

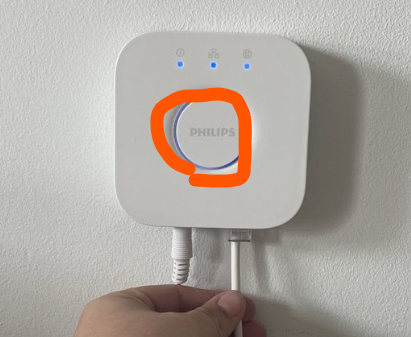
이러면 정상, 그런 후 휴 브릿지에 최상단 큰버튼을 눌러준다

그런후 다시 링크로 이동하면 값이 정상적으로 나온다
#이런형태
"success": {
"username": "Mw1oejYnbLTo9hBXygR6LVrhsdfsd"
}
#이후 노드에서 테스트 진행하면 된다
const Hue = require("@bradgarropy/hue-sdk")

const hue = new Hue(process.env.HUE_BRIDGE_IP, process.env.HUE_USERNAME)
const lights = await hue.readLights()

console.log(lights)
#샘플코드 공개
const Hue = require("@bradgarropy/hue-sdk")

const hue = new Hue('192.168.11.17', 'keysdfjhkjhsdfkj')

const readline = require('readline');

readline.emitKeypressEvents(process.stdin);
process.stdin.setRawMode(true);

process.stdin.on('keypress', async (str, key) => {
    //   console.log(`You pressed the "${str}" key`);
    //   console.log(key);

    if (key.name === '1') {
        //조명 모두 켜고, 밝기 최대
        await hue.turnOnAllLights();
        await hue.setBrightness('1', 254);
        await hue.setBrightness('2', 254);
        await hue.setBrightness('3', 254);
    }
    else if (key.name === '2') {
        //조명 모두 끄기
        await hue.turnOffAllLights();
    } else if (key.name === '3') {
        //조명(아이디 1,2,3) 노랑으로 바꾸기
        await hue.setColors(['1', '2', '3'], 'yellow');
    } else if (key.name === '4') {
        //조명(아이디 1,2,3) 화이트로 바꾸기
        await hue.setColors(['1', '2', '3'], 'white');
    }

    if (key.ctrl && key.name === 'c') {
        process.exit();
    }
});
https://github.com/bradgarropy/hue-sdk?tab=readme-ov-file
GitHub - bradgarropy/hue-sdk: 💡 philips hue sdk
💡 philips hue sdk. Contribute to bradgarropy/hue-sdk development by creating an account on GitHub.
github.com
에 자세히 나와있다
메일, 댓글 질문 환영
#hue #휴 #스마트싱스 #iot #node #javascript
'라이브러리(library)' 카테고리의 다른 글
| [nextjs/framer] framer를 이용한 nextjs에서 애니메이션 적용 (0) | 2024.04.24 |
|---|---|
| [autohotkey/매크로]키보드 마우스 매크로 구현 (0) | 2024.03.05 |
| 아카라 API refreshToken을 이용한 accessToeken 관리 (0) | 2024.01.31 |
| [1분 해결] ffmpeg 동적으로 인코딩하기 (0) | 2021.10.27 |
